
This is the interface that gives you control over how to manage the stored media files and images. Even though the media library has limitations, especially when it comes to optimizing audio, recording, video, and images, it can still execute image-editing and other functionalities.
To access your Media Library, select ‘Media’in your admin sidebar. Within the WordPress environment, you can upload image files, edit them to quality standards, and create the necessary linkages to internal and external pages.
This article will show you why the WordPress media library is one of the most underrated content management tools. Additionally, we shall endeavor to explain how you can energize your Media Library to its full potential. We will finally walk you through boosting the media library’s functionalities by uploading a plugin to domicile all your data management activities within the Media library.
How does it work?
All the Media files that you upload onto your website are stored in the WordPress Media library. The files include images, videos, audio, and documents in all formats like PDF, spreadsheets, word, and presentations. The media library is, more or less, a directory of every single media file that has been uploaded to your site. For you to publish images and files onto the web pages, they first need to be refined, designed and arranged to make them presentable to the people visiting the site.
1. The Media Library Screen
Media is ideally stored in WordPress as video, audio, recordings, and also files that are later uploaded to your pages. Once images have been arranged as required in relation to the corresponding texts, they can then be published on the blog on the website. All these functions are carried out in the uploading settings in the settings Media Screen. This is where the location and structure of the upload directory, where data is stored.
To upload media, whether attached or unattached to either a page or a post, the action can be carried out by using the media Add New Screen. To upload new media, do the following:
- Select the media
- Add New media screen from the left side menu
2. Media Library
The Media Library Screen is a vital tool in WordPress because it enables you to Edit, Delete, and view media on your website pages. You can also deploy several functionalities like search and filter, which can assist in finding the media you are looking for. You can opt to select multiple media objects for Deletion.
The Media library normally has two types of views, the Grid view, and the List view. While the Grid view is a simple user interface, the List view offers a conventional interface. Use the icons on the left above to navigate from one screen to the next.
How do I view and search for my Media library?
When you want to view your Media Library, you first need to go to your site; while there, you can click on media on the dashboard of your sidebar on the left of your WordPress Media. You can view your WordPress Media Library folder either by Grid or List. You can move between these views using the icons to the left above the screen.
Several options can suffice if you want to filter and search images. You can either do it by file type, the date uploaded, or the keyword.
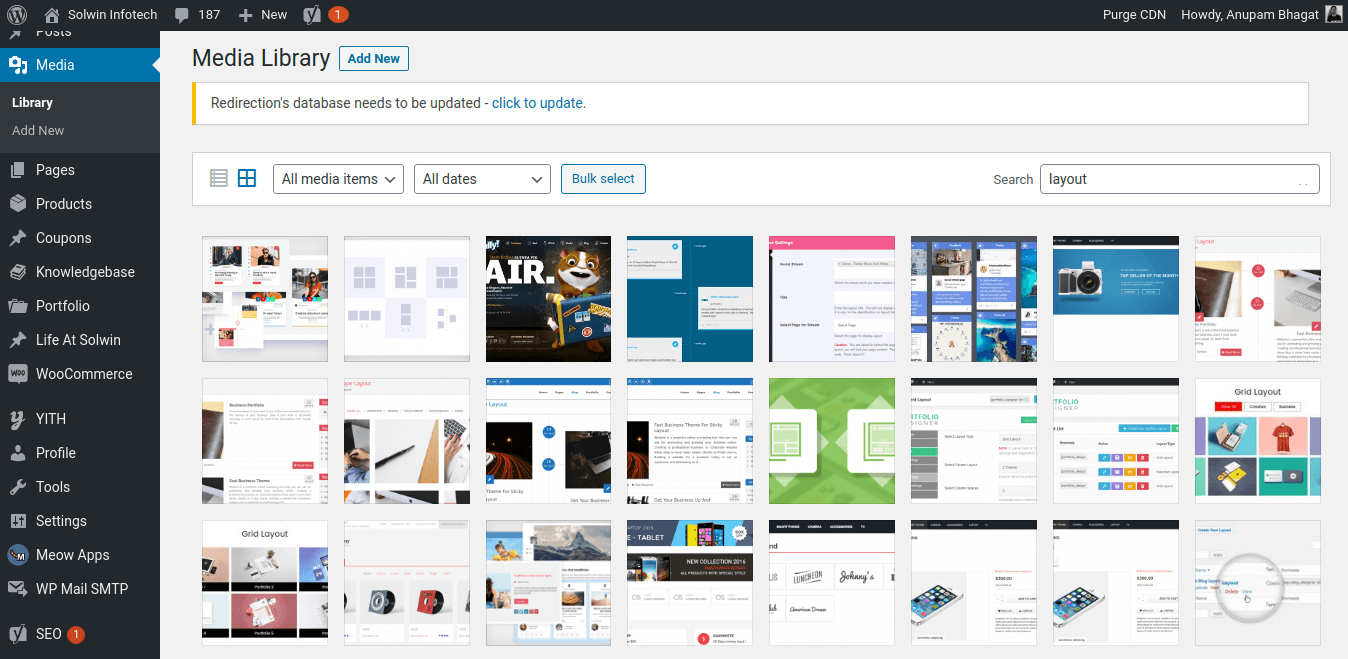
(A) Viewing Media library by Grid
When you view the Media library by Grid view, images, audio, and thumbnails of image align in Grid.
(B) Filtering Options
This option allows you to filter the media by date and media type. It’s generally at the top of the Grid view.
(C) All media items
The dropdown gives you access to select media types such as Audio, Images, and Video, whether they are attached or not attached to any post or page.
(D) All Dates
By default, the dropdown menu shows all the dates and allows you to select by date, which media are displayed in Grid View. To the right is a Search box. In this box, you can enter words to search and display all the Media that match the word you are searching for. As you type, the search result will continue updating.
When you want to delete media items, you can click on the bulk select button located on the screen. If you select items that you want to delete, click the Delete Selected button. To reverse the action, click the Cancel button, which will take you back to your view of the Media.
In the Media Library by Grid View, when you click on an image thumbnail, Audio icon, or Video icon, it will display an Attachment Details dialog that will allow you to preview the media and make quick edits. All changes you make to the attachment will automatically be saved. Individual items can also be deleted and accessed from the extended edit screen from the details dialog.
To navigate media with ease, you can either use the left or right arrow keys or opt to use the arrow buttons at the top of the dialog.
The right side lists the media attributes and optional data. Simultaneously, the dialog’s left shows the image—the attachment details to change its appearance and information by media type.
Details:
- Filename (name of media file)
- File type (MIME Type of media file)
- Uploaded on (the date the media file was uploaded)
- File size (file size of media file)
- Dimensions The dimensions of image media (Image files only)
- URL (Read-only display of a direcimagek to the media file)
- Title (name of the media. Usually shown on attachment pages and galleries if themes or plugins are designed to display it)
- Caption (A brief explanation of the media)
- Description (An explanation of this particular media)
- Alt Text (Image alt text for the image, used for accessibility-image files only)
- Artist (Singer, composer, or producer of this media.) (Voice files only)
- Album (Album title that includes this media.) (Voice files only)
- Uploaded by (the author who uploaded the Media.)
- Uploaded to (Click on the title to view page or post in an edit screen. However, this line does not appear if the media was unattached to any post or page.
Useful Read: Best WordPress Media Management Plugins
There are three link menus at the bottom:
1. View attachment page
This menu displays how the image will look like when it’s displayed in your Theme.
2. Edit more details
The link menu shows the Edit Media Screen.
3. Delete Permanently
Erases the media permanently.
Also, image files have the Edit Image button at the lower left.
- Edit Image
This menu allows you to make edits such as rotate, scale, and crop
- Media Library List View
In the List view, the table list all the Media by row. The media appears in order of upload, where the latest one upload appears first.
- Table of Media
The columns contained in the table of Media include:
1 Checkbox:
When this box is checked, it selects the particular media to be processed by a bulk action.
2 Thumbnail:
This appears typically as an image displayed in the column.
3 File:
By selecting the title link, it opens the Edit Media Screen. It is generally located below the title, where the actual name of the file that holds the media is displayed. It’s in the form of a link, the title, and the media’s name.
4 Author:
An author is a person who uploaded the media. It’s also displayed in the form of a link. When you click on the author link, all the media uploaded by the said author will be displayed in the table of media. This can allow a bulk action for that particular author to be affected.
5 Uploaded to:
This is where you can find the title’s description and the date when the media was uploaded. You can view the post or page in the edit screen by clicking on the title. If by any chance, the media is unattached to a post or a page, the“Attach” link will appear. You can opt to click on the media to attach it to the selected post or page. If the media has been attached to more than one post or page, then it will be displayed.
6 Comment bubble:
Every Media row usually has a comment bubble, which has the number of comments allocated for that media. When you click on the blue comment bubble, the comments screen will open to allow the moderation of any comments allocated for that media. If visitors to the site leave any comments, the number of comments is displayed in the bubble.
7 Date:
This indicates the date when the media was uploaded.
3. Sortable Columns
Under sortable columns, you can click on files such as the File, Author, uploaded to, and Date headings to sort the Table of Media by ascending or descending order. By hovering over the column title, e.g., file, you can see the up arrow or down arrow. You can click the heading to change the sort order.
4. Page Navigation
The page Navigation Screen Options is where the number of media displayed per page is determined. Two double-arrow boxes will move to the first and last page when one or more media pages are available. Additionally, two single-arrow boxes are displayed to move one page backward or forward. Lastly, a box showing the current page number can enter a page to display directly.
5. Screen Options
If you click on the Screen Options tab, it will show a list of columns with a checkbox next to each column. The screen allows you to select which columns of the screens will be displayed and which ones will not appear within the table. You can tick the box for each column you want to be displayed in the table, or uncheck the box not to display that column. Additionally, you can set the number of media items to display in the Table of Media. You can click the “Screen Options” tab again to close the Screen Options.
6. Search
To search and display all the media meeting your search words, enter the word or a series of words in the search box above the table, to the right. Press the “Enter” key to search and display all the Media meeting your search words.
7. Filtering Options
By using this, you can filter the media by media type and date:
- All
This action allows you to select by media types. The media can either be images, audio, and video, which can be attached or unattached to any Posts or Pages. The media is generally displayed in the Table of Media. When you select by default, “All” is selected, all of your media are displayed.
- All Dates
This action shows which media is displayed by the date, in the Table of Media. When “All dates” are selected by default, all the media are displayed.
- Filter
When you click on the filter, it applies the settings you select in the dropdown menu.
8. How is Selection, Actions, and Apply used?
1. Selection
Once you select one or more media in the table, this screen will affect bulk action on the selected media. The media must be first selected via one of the following methods:
1.1 Select one media at a time
– This action typically affects selecting only the required media by clicking on the corresponding checkbox to the left of the Media entry
1.2 Select all Media in the given Table
– When you select this action, all media in the selected table will be checked, and a collective action effected upon them. When you want to reverse the action, you can do it by unchecking the header or footer title bar checkbox.
1.3 Reverse Selection
– This function will either do or undo a previous action. Effect the action by holding the Shift key on the keyboard and then click the header or footer title bar checkbox.
2. Actions
The above can be done on a selected Media through the Action or Immediate Action as follows:
2.1 Bulk Actions
These Actions can be subjected to one or collective Media. It can be affected by choosing the bulk Actions pulldown box above the table. Only bulk action is allowed to Delete the Media Permanently.
2.2. Immediate Actions
This action is taken to effect Immediate Actions on an individual Media. To take this action, hover the mouse cursor over the Media row to reveal the Edit, Delete Permanently, and View options under the File column in that Media row. When you click on a Media Title, you can also initiate the Edit Action.
The available actions are described below:
- Edit – This is an immediate action that opens the Edit Media Screen. This action can easily do by clicking on the Media Title.
- Delete Permanently – When this action is activated, it deletes all the media permanently. You can use “Delete” both as a Bulk Action and an Immediate Action.
- View – This is a simulated action. It presents how the image would look like when displayed in your Theme. The view is available only as an Immediate Action.
- Attach – This Action allows you to attach the media to selected posts and pages. The Attach action is displayed in the Unattached filtered view. When you click, Attach link in the “Attached to” column or “Media” column, the unattached filtered view appears in to Find Posts or Pages dialogue box. You can either select Posts or Pages you want the media to be attached to.
The following steps can be taken:
- Search posts or Pages by keyword
- Select the post/page you want to attach the media
- Click the Select button.
3. Apply
Once you select an action to be effected on media, the Apply button performs the selected media action.
- You can click the Apply button to execute the Bulk Action specified in the Actions pulldown on the selected media. However, you must select the Media to act upon before you execute this action.
- Select the post/Page one wants to attach the media
- Click the Select button.
- Apply
Organizing WordPress Files in Media Library Folders
WordPress, by fault, creates folders typically based on the month and the year the folder was uploaded. So if you want to structure your WordPress Media Library folders, then do as follows:
Why Organize Your Files in WordPress Media Library Folders?
All files and folders uploaded to WordPress are stored in the /wp-content/uploads/folder.
This is where they are categorized and Organized by month and year—for example, http://example.com/wp-content/2017/10/. The above example shows the file name, uploaded to the WordPress Media library beginning with the year, then the month.
While working with a simple website will be good to go with the above structure, users running a much complex website might want a more robust way of how their data is a store and, by extension, manipulate. These users would prefer their data stored by specific topics, clients, items, and so forth. This method will see them gain full control of how they store and use their data, not forgetting the convenience it brings.
How to Organize Your WordPress Files in Media Library?
If you want to get better access and control of your WordPress files in the Media library, you can use a specialized WordPress Media library plugin like WPFileo. Such a plugin will enable you to execute complex functionalities and, in essence, have better organization of your data management in the WordPress Media library.

With ambitious features that allow the user to create folders or directories, create sub-directories, Re-name folders, count files and folders, search and sort functionalities, it empowers the user by availing powerful tools that can assist in the manipulation of data. Other notable features of this plugin are: Drug and drop, organize and color label, Bulk move files, move files before deleting folders, move back to the default category, and fully functional in media lightbox.
It also has the following in its arsenal: color scheme for Media manager and Adjusts Media manager, among others.
Useful Read: How To Organize Your WordPress Media Library With WPFileo Pro?
How do I edit my images?
Even though not as perfect as everyone would want it to be, the WordPress Media library can still edit images. With useful features in its image editor functionality, WordPress can do the following:
- Crop images
- Scale them up or down
- Fix sideways image rotation
- Flip the photo upside-down
How to Edit Images
Editing images is important because you can plan for the space and design of your pages. The user can also match images with their text. Some images might be smaller or larger and unable to fit the available space. Therefore, you can edit such images to resize, scaling them up or down to fit the allocated space.
Editing Images in WordPress
- To edit images, you must find and upload the image you want to use to your WordPress. You can deploy two options, either by drag and drop onto the visual editor, or you can select Add New to get them from the computer into your WordPress Media library.
- After the folder is upload, click on the image you intend to edit. After clicking on the image, a window will emerge, with an Edit image button right under the photo.
- This button will open a window where simple image editing tools like crop, flip and can be seen.
- The Crop button will scale your image by aspect ratio to make it smaller. To crop your image, click on that button and hold The mouse at the precise point you want to use.
- The rotate button can turn the image either 90 degrees to your left or you’re right
- The flip button can either turn the image horizontally or vertically.
Once that process is done, and you are satisfied with your image’s outlook, you can click save to save the image.
If you don’t like the image’s outlook and cannot use it, you can click Undo to revert to how it was at first or use redo to return it to the edited format accordingly.
Conclusion
WordPress Media Library is a powerful content management system. It can edit images and work as a robust datastore where content can arrange and manipulate before publication onto the website pages.
To enhance its functionalities and turn it into a more formidable force in the organization and management of data, you need a robust plugin tool like the WPFileo. This tool will strengthen the WordPress Media Library folder management’s execution and liberate your Media library into an independent Database manager.